Showing posts with label kaiser craft. Show all posts

Thursday, June 15, 2023

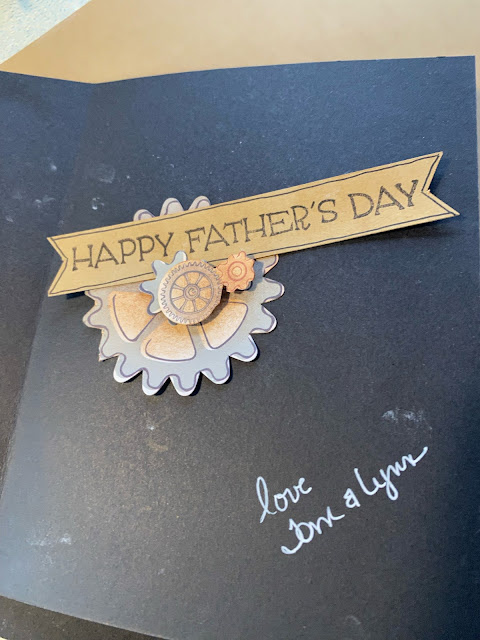
Father's Day card

I've been wanting this guy for a long time and
Joann's had a stencil die cut package
that had to be purchased.
Actually I dithered about it.
Just using some manly colored cardstock and distress ink-walnut
for the stencil and mussing up the gears.
For some reason I made the dude's hair with aged
mahogany - TH distress crayons.
(love them).

The inside with some more gears and a sentiment.
Got it in the mail but its probably gonna be late.
Sadly.
I am sooooo bad with dates.


Saturday, September 10, 2022

Birthday card "let life surprise you"


Well it all started out at HL when they had
the TH dies on sale.
And I decided to use them right away.
The background is the 3D gear embossing folder by TH
and I admit it is an odd choice, that actually kind
of works. That too was premade and
I really liked the colors with the catus colors.
which except for the card is TH papers.
The sentiment was already on it and
it's a surprise party - I figured it'd be a fun start.
On the inside at the same HL sale I bought the
bugs. I admit its an impulse buy and
of course made some that day.
The swirl is also TH die - an older one 665845,
he forgot to name this one. LOL.
The Happy Birthday is actually from Kaiser Kraft
-Coastline
if you ever see that collection. 
Get it.
You will not be disappointed.


Wednesday, December 30, 2020

Tag booklet complete - the backside

I finished this baby fast.
You can see the start and additions of the booklete here and here.
I was making the tags and the majority are mixed media
and therefore, a lot of bleeding going on the backside.
Therefore, a solution was required more or less.
I was still out on the fence because mixed media is supposed
to messy, however.
There's messy cool and messy messy.
So my pals Holli and Brooke convinced me that maybe the
backside needed some cover.
(as if a normal scrapper couldn't figure that one out)
LOL.
I could've covered with mixed media and/or plain ole
pattern paper.
Where's the fun in that. 
So....I decided that embellishing would be 
great fun and it was.

Not necessarily in any particular order because blogger
is a pain in the ass about that.
Heaven forbid they actually upload in the order
I went to great pains to do.
But I digress.....It turned out to be a lot of fun
and I did all the pages in one night
and doesn't that prove the fun.

Using a bit of this and that from PebblesWoodland Forest.
That paper bad is soooo cool and I felt it
complimented the mixed media I was using on
the tags.


Got to use a lot of stash.

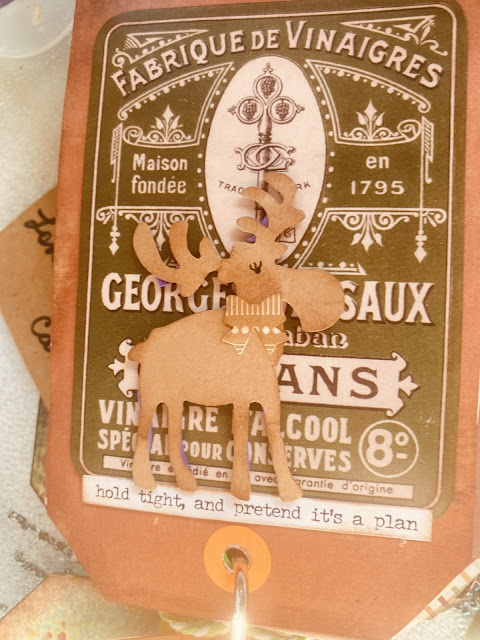
I think the deer is Bo Bunny but I can't swear to it.
I have a bad habit of tossing packages and
tossing everything into one tub.
Sadly, my head is like I can remember it and
my memory is like - yeah no.

It was a great play and I got brave and started
splatting some mists and nuvo around.
I love that lady - it's TH - a stamp and die.

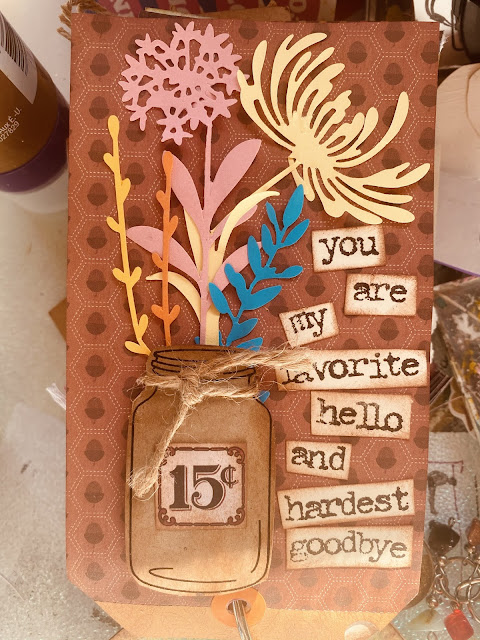
OOOOO and I love those fauna and flowers
and decided that the bold colors
would be rather pretty.
I love that sentiment.


Love the Christmas cheer and I think I 
need to add a few splats as I look
at this photo.

I got to use some washi tape.
I have issues with using it - it just doesn't look right
when I plop it down.
This actually worked out.

Love my tag booklet and I'll be making a few more.
For some reason I flung out a lot of creativity
that I would normally stifle on other projects
because I have a set thing in my head
that screams you can't do that.
Well I did it.
And I'm gonna do it again.

Happy New Year!


Friday, October 14, 2016

Oversized photo to point to a mini album

I love this photo - and I stalked
these horses for 2 days to get it so when
I wanted a photo to point people from my main album
to the mini album I put together on the road this
was THE photo to use.
Making it 8.5x11 is a great eye catcher.
 I think I have a mix of Kaiser craft and
maybe some Tim Holtz - I can't be sure because
all the packages exploded in the huge baggie holding them all.
 My journaling is on that tag hidden behind the photo
in order to get it into the page protector later.
I will also slit the page protector to get it out to read.
They are gorgeous animals that are totally wild.
They get no doctor care, nor are they fed.
The only time there is any type of interference is
to use birth control to keep the herd down
because the land can only support about 96 horses.
I kept it all to a minimum and I love it.
I also used those great Adorn-it letters that I used in
my road album so that ties it all together.

Tuesday, September 27, 2016

Oversized photo

This photo needed to be 8x10 more or less.
I wasn't going to back it but the photo paper I printed
it on was so flimsy and it needed some stiffness.
I was also out of my mind with printers this day.
My HP-8250 that I've had for a lot of years bit
the dust by spewing ink that couldn't be cleaned up.
Then for some reason my remaining
printer took FOREVER to print - because the lid
was up (which it wasn't), then I needed to change the ink
(which I did) and then it couldn't "see" it.
(which it finally found it).
SIGH.

Because of the "white space" at the bottom
I kept most all the embellies there.
 I did get a bit over the top with words but
they worked.
Added this at the top because there were "legs" there.
Soooo. Now there aren't.

We take this photo annually and it's mostly family
and some friends.
The dynamics seem to be changing each year, people come and go.
And it was windy.
Really really windy - if you noticed.
I actually tossed mist on the photo.  *gasp*
I love doing pages like this - and need to do more.
If I could find 12x12 photo paper I'd be doing that too.

Sunday, October 11, 2015

Creating the individual Heritage pages


For some reason, I had it stuck in my head that heritage pages
were different.
That you couldn't do the current stuff so my first
few pages are sort of plain
and I decided to leave them that way.


Love that there were some papers that could be used for Christmas papers
and added some Basic Grey stickers to keep it along.
There is no notation on these 2 photos and I can't decide
if its one twin or both.
I will need some help from my SIL for this one.


I could tell these were the two twins. Mostly because the back of the photo said so.


I started getting braver adding layers and mists and twine.
I was disappointed because these papers
do not do mists well so I found I need to be careful.


And then I found some long lost Paper studio
metals I picked up just in case awhile ago.
Those butterflies are so cool


I have been backing all the papers because they are thin - 
very thin and tended to flop about so
that'll be consistent throughout the album.
I'm also trying to use the same embellies and diecuts.

I added some thread - that you can barely see because 
everything appears floaty and disconnected
and I hope the thread adds that
connection.
I have also done this page - a long time ago.
If I can find the old one we'll check out the styles. 
LOL.
Won't that be fun and embarrasing.
It feels like a bazillion years ago - actually in the early 2000's.
This is 12x12 - cameras were different back then as well.
And prior to my blog it seems.


Tuesday, April 28, 2015

Another collagy page

I warned you this would happen.
I took these photos were taken as we relaxed at Babcock Webb
Wildlife Management Area and while
I could've scrapped each individually - however, some of
these photos wouldn't stand on their own
or there are really no stories behind them, i.e., bee on a flower, 
bird in the grass or a dead snake, etc.
The snake story might be amusing though as it was lying
on the side of the road-dead with its head and rattler cut off and
how macabre is that....
- seriously
we mostly relaxed in a chair,
I took the most of the photos from said chair
what more is there to say.
So.....
They look awesome in the collage,
they look great in the album not taking up a bunch of room, 
and bonus ding ding
 no one is bored because Lynn's storytelling is slacking.


Friday, April 24, 2015

Building a page from the scrap box

Every now and then I feel the need to scrap even
when I'm not
being inspired by a photo.
Gasp - I know.
I either find a base paper or sometimes
I plow through my scrap box to start the process.
This is my bucket of scraps and it seriously needs to be whittled down.
I found some scraps and papers that spoke to me and layered them up
and also used the branding strip as washi tape.
I usually design the mats and layer landscaped because that's how
I take the majority of my photos
although, if I do decide to use a portait photo I can
just flip the page around.
It's a this point I begin the hunt for a photo(s).
 I never know what direction it will really take until
after I find the photo.
In this case, I found a heritage photo that had
writing on the back and it just
truly struck my fancy.
I photographed the back of the photo and adhered it to the back of
the page with some washi tape
as was too huge to work it into the design.
I can't decide if its my Aunt's or Nana's handwriting
but it is chockful of info - people, address, parents (of the cousins)
and more or less the year.
It totally made me swoon.
On the front side things came together rather quickly
once I decided on a photo.
The tag has the journaling and can be pulled out and read.
It also points the info on the backside.
Looking at my dad and aunt when they were kids and
now we are all grown up and my aunt no longer with us, it made me
focus on the title because while its cool to move into
different stages of life - the photo does point out at how fast life moves.

Studio Calico, Echo Park, Kaiser Craft, Basic Grey
and my homemade enamel dots.

Friday, March 6, 2015

Mat-Background papers created with gelatoes

This background paper was created when my pal
Holli and I were messing around with gelatos way back when
I had my knee surgery which was April 2013.
Wow. :|
Those painted pages actually got lost in the immense amount of papers 
I acquired over the years
and after I did that major purge - wa-la.
Found it!
Better late than never.
And there are more where that came from.
 So I whacked down the 8.5x11 custom made paper to use as mats
and background paper.
 ooo ooo and peaking out from that leaf is my homemade washi tape.
I also worked in "totes magotes" saying that came in my kit -
with a bunch of other creative and sayings and
honestly, I should be getting points for that because seriously -
those words need to be outlawed - LOL! 
The transparency fruits were fun to work with, using Zots
to adhere them down. Zots are very sticky
and if you rub them in you can barely see them
through the transparency or
if you creatively layer something else over it
- same result or just don't worry about seeing the adhesive. 
I did build this page without any photo in mind.
After which I did find the perfect photo in my iphone downloads.
How spot on was that.
I even worked in that wooden thing from Studio Calico
and I'm thinking points for that too.
Actually it is a pretty cool element- and while it has dimension
it really doesn't make the page "too fat".

I did have issues with the photo strip - I kept trying to find photos to
fit on the strip and after pulling my hair out during the search
I decided that it could be used for journaling- doh!
Amelia loves her fresh picked apples!

Studio Calico, Kaiser Craft, Thickers, gelatoes, homemade enamel dots.

#scrapbooking

Friday, February 20, 2015

DIY - Washi Tape In case you missed it on OTR

Last month I kicked the tires on making your own enamel dots.
I loved doing that and decided that maybe I'd
test drive making your own washi tape.
Again - there are a bunch of tutorials out there and I thought I'd narrow it down.

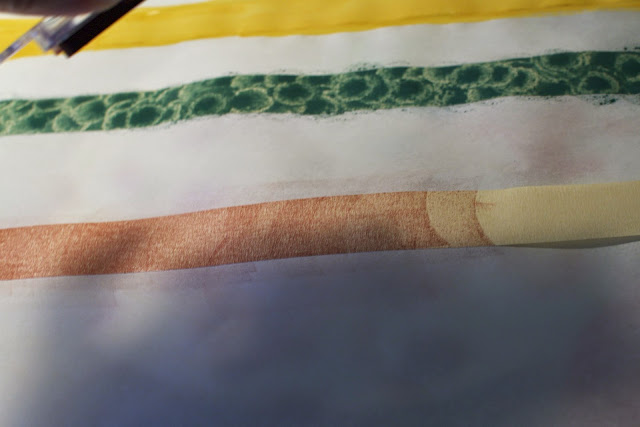
You'll need parchment paper and I used a 1 inch roll of masking tape.
I did  pick out some paints and stamps and then decided to change things up a bit.
 Lay out strips on your parchment paper - which allows you to remove
the finished product without losing the sticky.
 I used a craft smart mustard yellow enamel paint and slapped it on the tape end-to-end.
 The next I wanted to try a Ranger dauber - green - but all it says on the label is earthtones.
 I also tried an ink pad - that has chalk in it.
  It does take the chalk ink a bit longer to dry.
 And depending how much color you want you have to dab a few extra times.
 Since there was a lot going on I decided that StazOn ink would be best.
 I'm not the greatest stamper in the world - but I really liked the outcome on each.
 I liked the swirly texture from the dauber and used another chalk ink-Studio G 
to stamp the adorable "prima looking" flower stamp from Studio G.
 So far so good.
 Went back to StazOn because I wasn't sure of chalk ink on chalk in.
And the stamp is from Creative Cafe. A total blast from the past.
 And wa-la used the heat gun to get them dry and left them under the lamp for good measure.
As you can see the "washi" tape lifts right up.
 I used pincher clothes pins to wrap the "washi" around.
You are good to go as long as the front and back don't meet. 
So wrap the first little bit around one of the pins.
 From there you can wrap around both pins and it won't hurt the "washi"
doing that. It pulls off rather nicely and rips off easy.
There you have it - 3 varieties of "washi" of which I used one for a page.
Guess?
 The green worked out so perfect on this page.
Blending in nicely with the watercolors and embellishments.
 Used it in 3 places and love how it turned out.
 Can't see much of the flower but it works.
The finished product.
I'm not concerned about the tape per se, as I kept it from the photo.
Also I really don't get overly concerned anymore about items not acid and lingen free.
I found a scrapbook my mom made back in high school with
all the things they tell you NOT to use - and after 60 years it was practically
pristine. It was kept in a cedar lined chest for some time but,
I have been a rebel for about 12 years and never had issues with using
shall we say, non sanctioned scrapbook supplies.

Paper Studio, Kaiser Craft and Bo bunny papers.

#scrapbooking