Showing posts with label homemade badges. Show all posts

Wednesday, May 13, 2015

Cute little girly camera album - done!

From a previous post I teased about this adorable album that
I changed up the "instamatic" colors to make it girly.
 Picked out my favorite photos and found some 
lovely papers that I canNOT even begin to tell you who the
mfg is because there was nothing to tell me.
They look really familiar and its on the tip of my tongue
and if you know - please share.
 These two pages needed a buffer so I found this adorable
butterfly transparency from my stash
(and I used a bunch of stash here)
to keep them from getting caught on each other.
 The embellishments go between an Authentique sticker
sheet - really old - its a girl one
and Paper Issues Swag Bag stuff and Studio Calico
bits and pieces.
 I made two homemade "flair" badges below from
some PL cards in the Paper Issues Swag Bag - the palm tree and
camera - they turned out seriously adorable.
I have really enjoyed putting together this mini albums.
I have a couple more I plan to do - 


Thursday, March 19, 2015

Another All About Me page

Since I feel my everyday life is kinda boring
I  just can't seem to get excited about Project Life - there just
isn't enough going on - not even in a week.
However, I did decide to scrap my morning routine and call it a day.
Crossfit is not boring - let me just clear that right up.
What it is, is an important piece of my everyday and 
I want to document it.
 Since CF photos are few and far between
because everyone is busy working out and not worrying about photos
 every now and then......
some photos that come along.....
 And this is so great - especially when its all my peeps,
 and then some,
 all with whom I stretch, 
sweat, and burn in one photo.
Love that.
 And here's my homemade badge with the initials of my box.
Love that too.
Their names are noted on the back of the page because
there are a lot of peeps since there was only one class and it was
a mix of other that come at different times
and it was sooo cool to be able to meet others.
 This was the Christmas Eve WOD before we got all hot and sweaty.
I also have a New Years Eve WOD-after photo after we're all hot and sweaty..
This is my everyday, including holiday eves, and these are my everyday people.
Love them.

----------------------------------------

As you can see by now - I also have square QK cookie cutter dies
(along with circles and stars). 
I have more shapes where they came from.
Beware.....

Here's some old Studio Calico paper I had no idea what to do with
but find it works perfectly because it has all the months on it.
And I am there - every month - M-F.

Then after I burn, sweat and stretch I go home take a shower, 
drink a recovery shake
 and then take a nap - a really long nap.
Its the hot shower that does me in I'm thinking.
Yeah, let's blame it on the shower but it couldn't possibly be
that my entire body has a good ache going on.


#scrapbooking

Sunday, February 8, 2015

What happened at the crop

Stays at the crop!!!
A good time was really had by all 
although it didn't start out that way.

I seriously had second thoughts about going 
as the mojo hadn't been flowing well
for the past month or so,
therefore, when I packed it was haphazard
at best without thought or regard.
THEN......
The morning really didn't go well
and when I finally made it to the crop I was
CRANKY.
To say the least.

Hauled everything out of the car and commenced
to scrapping.
Everything was so disorganized and that it even made me more crankier.

Then the little album I was going to use was a PIA
because even the tiniest bulk didn't work
and broke the page protectors.

So that was eventually scrapped and I broke out 
the chipboard which I should've used 
to begin with....
so I'm glad I did a last minute package of chipboard,
my little hole punch thing and some embellies.

Of course because I am giving the album away, therefore I was more
anxious for it to be perfect than normal.


The crankiness eventually went away as the women
at my table became more interactive
and when the goofin' and silliness started -
the black cloud totally vanished.
And wa-la creativity started to flow
and my goal to finish the album - was met.

Echo Park - baby girl.
And on page 2 my homemade flair badge.

I crocheted a baby blanket and used baby yarn because it
was soooo pretty and reminds me of candy - however, I found it
tough to work with - as my fingers aren't as nimble as they used to be.
 I love that snappy little 
headband I embellished it with and you have 3 choices of bands.
oooo la la


The tag I made to jumpstart my mojo a few weeks ago will be used as a gift tag.

Wednesday, January 28, 2015

My take on making your own flairs tutorial

After checking out some online tutorials about homemade
 flair badges I decided to check it out for myself and relate my results.
I know you're excited.
I was.
Would you believe I had to buy a one-inch punch?
Isn't that crazy.
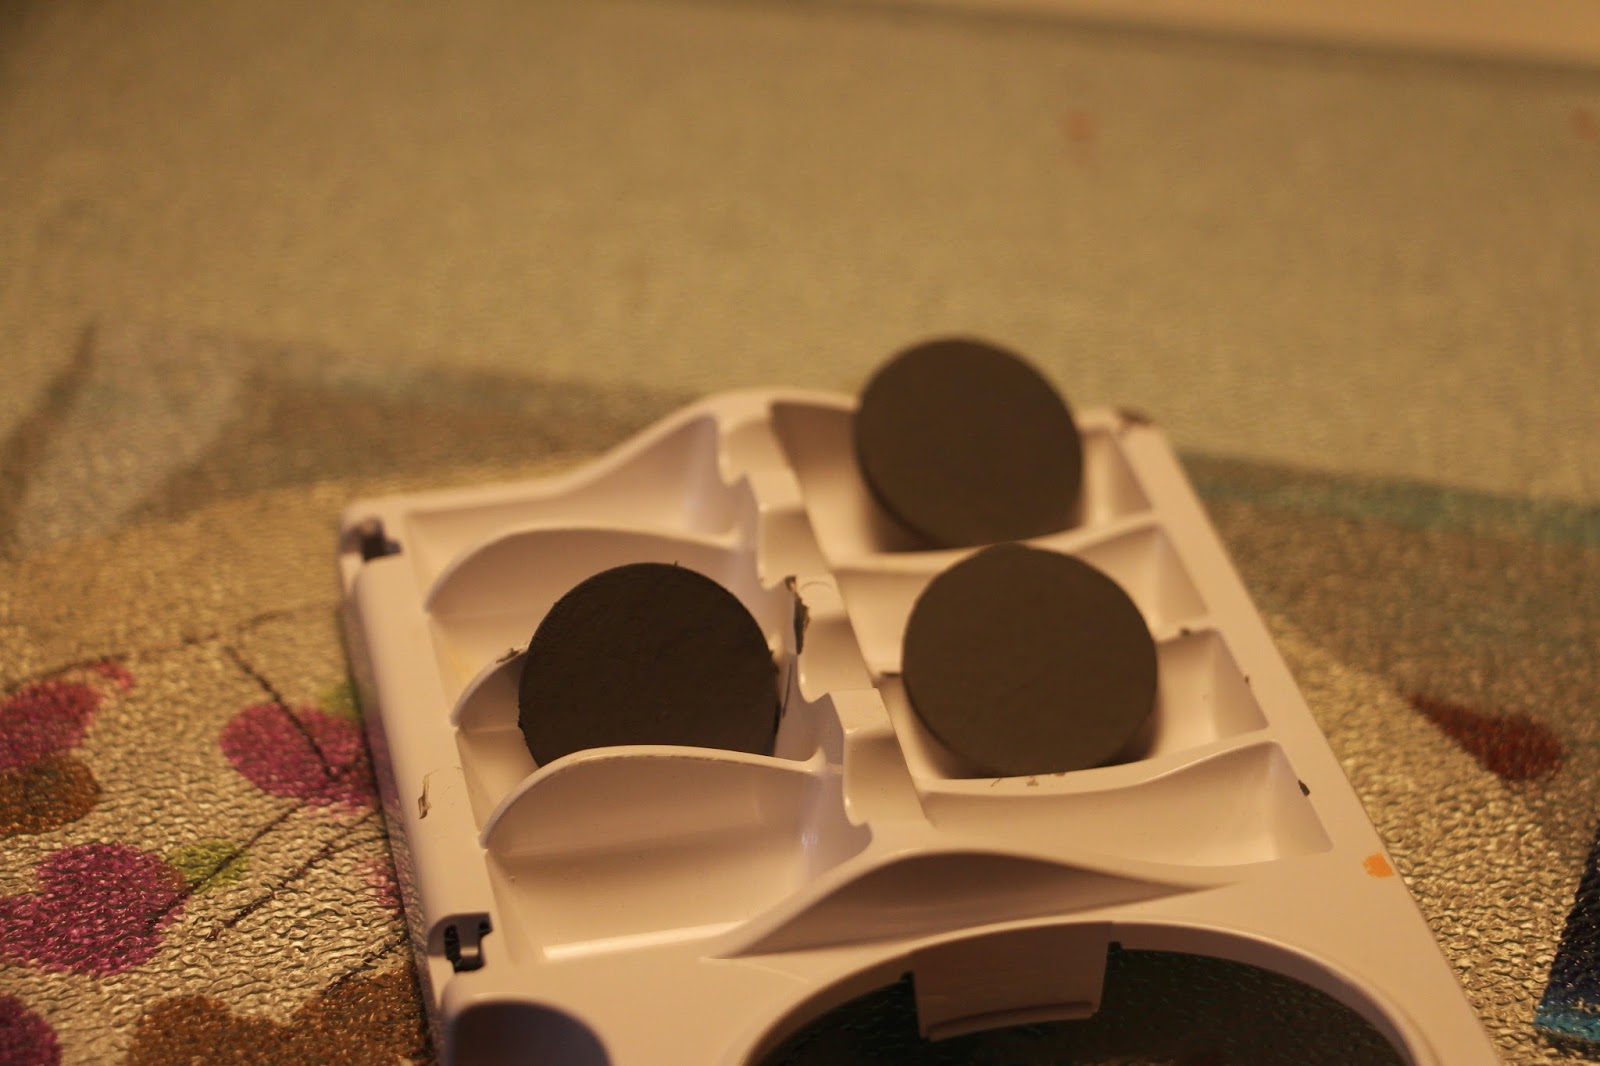
 I used my brand new one-inch punch and punched out 9 circles from some chipboard.
It was pretty thick chipboard - as I use them for my baby albums and
I like them sturdy.
 Glued 3 together to make the recommended thickness.
And then painted them gray.
As I made more due to some man-made disasters
I switched out to this less thick chipboard as the first one 
was threatening to break my punch.
I also decided to not paint them this time and honestly,
I'm okay with the "rustic" chipboard look.
 The less thicker chipboard with 3 glued still had the same thickness.
 I purchased some one-inch epoxy stickers at Hobby Lobby
 and I also had some glossy accents to test as well.
 I stamped some designs on regular pattern paper and used some
watercolors to make them pretty.
 Waited not so patiently for them to dry and added the expoxy sticker
and as you can see - it has the depth of a flair badge.
Below are my versions - I added die cuts, punched out labels too.
The one that says "its a girl" is glossy accent and really
you can't tell the difference.
The only fatal flaw is that you have to wait for it to dry.
Using a heat gun is disasterous and leaving it lay around can lead
to other types of catastrophes, such as laying stuff on top,
using a heat gun, and leaving your finger print as you poke it
to make sure its dry.
Just to name a few.
 The glossy accent was my 3rd try.
Just sayin.......
Above are my homemade flairs.
I will give this another whirl as I have some
other ideas in mind.
And below in a not so pretty photo - showing my badges
against the real deal.
They turned out pretty good and its nice to have the ability
to customize them.
As you will see below on a page.
The themed ones from Avacado Arts called my name -
actually screamed heritage.
As you know I adore heritage.
The black, grey, gold are lovely colors together
and they became the inspiration for this page.
 They are not as crisp as "real" flairs though the rustic-ness works well for this page.
Broke out my diecuts
And doesn't that photo make you swoon.
My great grandmother.
 And the doily.
Love the daintiness it brings.
I love how the badges worked out on this page, they really added flair.
yunk yunk.
If you give this awhirl, please share the results
I'd love to see them.

My great grandmother -as a young woman.
I have no idea how young - so I'm guessing maybe 20.
Its hard to tell back then.