Thursday, February 3, 2022

Playing around with stamps, oxides and crayons

When I'm in a creative mood and have no photos
to scrap and journaling to write
I like to keep the juices flowing by messing around.
I get a bunch of stamps and pull out whatever mediium 
that rocks my mojo and let'r rip.
So the leaves are a cling stamp and I used oxides.
I used a multitude of crayons and then rubbed vintage photo
distress ink over them. 
It covers a lot of sins and make things stand out.
I also traced the leaves with a graphite pencil and did a
scribble thing I saw on line only it looked way better when 
they did it. 
I'll probably fussy cut these leaves.
This flower stamp annoys me because no matter how
I stamp it just doesn't all come out.
I use a rubber mat, a brayer, and glass. 
Anyway, it looks really cool when using the oxides
by doing the tap and scrape method as
nothing is perfect.

Crayons on the stamped flowers.
I decided to not rub distress ink over these 
and I do love that method, but I can always add it.

My friend Holli is the proud owner of these stamps
and we get together and crop and swap so I
always stamp a few to take home with me, actually
I do several stamps mostly because the first
few don't come out right, but I have a stash because
if it really looks fun and cool why
not use them often.

These were done with the crayons.
As you can tell I love the crayons. 

They'll be used for journaling cards, embellishments, etc and the
bonus is they're premade. It'd be fun to build a page
around them. Just sayin...

I wish I could tell you the colors but I pull out all that I own
and after I use one I toss it on the pile and then...
well...no names of the crayons.

All was done on watercolor paper.


Monday, January 31, 2022

Valentine's Day cards for the grands

These were so much fun and easy to make. 
Seriously.
Picked up the embellishments first along with some hearts
to match with this Doodblebug collection "lots of love' which is the 6x6
paper pad that I wasn't going to purches. My pal, gifted me. 
Love my friends.
The embelleshmnet packed "odds and end"
was used for the really fun and
cute stuff on the front.
And there's a ton of stuff in the packed in there.
Each card just fell together.

Love them.


Sunday, January 30, 2022

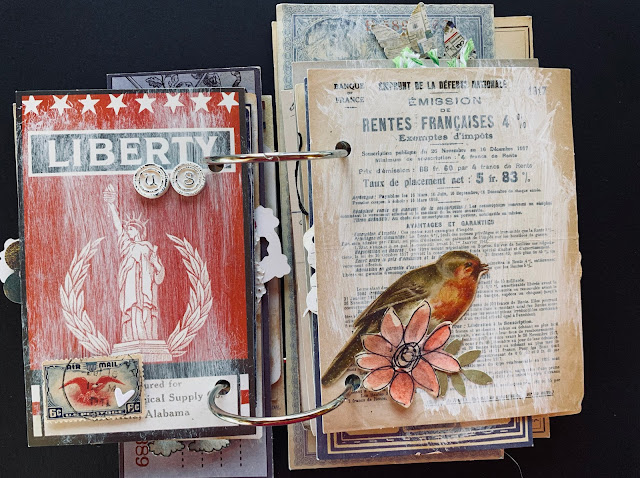
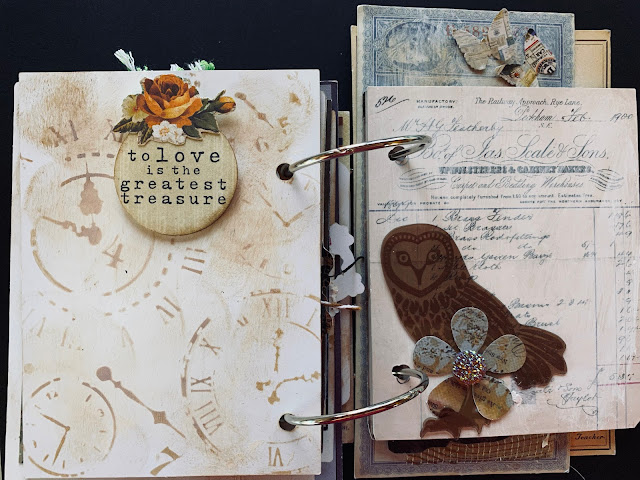
There's a fine line between genius & crazy mini album - Made with Tim Holtz STUFF-mostly....

I don't normally order stuff on line but I was soooo
excited to get some TH stamps - called "Good Thoughts"
and there it is - one on the front cover.

In putting the album together, I picked out all the tags and
big stuff from one or two of his ephemera packs.

It laid around for awhile because I didn't know what I wanted to do.
In the meantime, since it was laying about - I took some
gesso and whitewashed the pages because they
needed to be mussed up a bit to hold stuff.


And it looked cool.


Once I got rolling it came together but I did have to remind
myself to not overthink things. 

Those stamps and envelops are from my Grandpop's collection
and it's soo cool that I have them throughout my 
albums.

I did use some of my handdrawn stuff and
a few other things that weren't gonna go anywhere else
found a home.

Love that pouch that my pal Holli die cut for me (I have 2 more)
which is a great spot for journaling or more photos.

I did leave some room for other embellies to join in 
because sometimes with titles you find you lack a photo to match.

Honestly I love this style and I used to do this shabby chic/ancestry look a lot.

Ii found it fun to match things up and they way things
are adhered, photos and such can be tucked under if necessary.

I also figured room for matting and I fussy cut the "love this" title from
an old project life card.

Fussy cutting and punches came in handy. 
I love the big finger pointing hand.

And that rooster, swoon.
Picked that stamp up from my LSS - and so far....yum.

I tried doing something on the back and it didn't quite work out
and my attempts at a cover up aren't 
working out either.

So I may need to resort in a heftier cover up. 
I'll keep ya posted.


Sunday, January 16, 2022

Homemade project life cards

 I love making my own project life cards.

They are so much fun when Tim Holtz and his oxides and distress inks 
are at your fingertips.
I added the coffee cup which I drew was added.  I
fussy cut that adorable house from one 
of those embellishments from the Pink Fresh paper pad
which I have to admit that all the cards came from there.
Finally used some really really old Studio Calico washi tape
and that stamp on the circle where I attempted a
concentina fold with tissue paper.
The butterflies are a Michael's stamp - like in the $1 bin
and that card was made with shimmer powders.
Love them.

Also just between you me that circle with the conentina fold
is covering up and hole that said Good times.
I thought if I cut it out I'd like that "look" and
because the card I used it on had journaling and those
itty bitty grey dots covered the writing 
AND
therefore a repurpose of that premade acrylic card that
I whacked up because it seemed like a good idea at the time.
The struggle was real.
3x4 size


Monday, January 3, 2022

Baby boy 4x4 album

For my new great nephew.
I love how it turned out.
Little man is supposed to be born on the 21st of FEB
I'm on the 18th and my dad (great grandfather)
on the 20th it'd be great to hit his.
Fingers crossed.
So I put the 21 in there just in case. 
Maybe I'll add 18 and a zero LOL.
Busted some stash - using really old 
Basic Grey.
I loved Basic Grey.

One is an Aurora 6x6 pad and the other
I don't recognize and lost the title page LOL.

Little bit of TH in there. I found a milk top from KY
which is where the little man will be born.


The baby stickers are from Paper Studio.

And bits and bobs from other miscellaneous stuff
and punches.

And a sticker book from Kaisercratft about dad.

Also whipped out the die cuts, fussy cut and drew my own stuff.


I alternated on the 2x2s with embellishments
and photos that can be used and all
can be rearranged.

Had fun with the moon die.

I also did repeat some of the stickers which
makes the album well an album
that flows.

The last of my 4x4 albums that at first I had a 
love hate relationship with because
of the 2x2 page protectors.

I don't know little man's name or initials which can be 
added at anytime.
There's also a baby blanket in the works and a run for baby stuffs.


Thursday, December 9, 2021

A Wedding Card & Mini Album

Our nephew recently married so of course I made
a card for them.
Using die cuts and punches, I love how
it turned out. 
I used sort of "autumn" colors since it is November after all.
On the inside of course I had to use my new
Tim Holtz 3D heart die cut and I love how it turned out.
The sentiments are also from a TH phrase booklet.

So THEN, at my LSS I saw this DCWV 6x6 pad that ALSO had 
embellishments to go with.
So, our nephew and new niece LOVE the beach, shore, ocean
and this was perfect.

I absolutely fell in love the papers.
They were just perfect along with them embellishments
and lots of stuff to fussy cut in the paper pad.


I made a tag to tuck in the envelope
which I love and hopefully there'll be journaling on it.

I used our invitation in the album as well and it was so
pretty it needed no embellishment.


I only put a couple of photos in, because there aren't
many out there that are really good
and I didn't take many either.
I know. My bad.

Is that paper not gorgeous and perfect.
And those embellies.
YUM.

Of course I wanted to give some guidance as to what to do.
Tucking stuff in, journaling, etc. and of course,
I couldn't do that on a plain white piece of paper so...

I made this tag that I just loved and really didn't want
to give it away LOL.
I absolutely loved making the card and the album.


This year's Christmas Cards

I had an opportunity to make some
cards for our Vets this year.
It was a lot of fun, using Ranger Oxides
and Crayons for the stamped images.
I bundled them up in
order to drop them off easily.


And for the grandkids I made them sort of
alike, yet different.
LOL.

Using a Sissix die cut that didn't
have a lot of moving parts which was
lovely.

Some nights I did one, up to 3 maybe
four so it didn't take but a couple
of days doing it that way.
I did all the card cards at once and the same,
but I wanted Santa to be somewhat different.
I  did the Santa's and all the die cut things
one-at-a-time and put them together as
they came off the die cut machine and then
added them to the cards and
finished it inside and out.
it was so much nicer and easier in
keeping all the parts together,
including the dies because the pieces didn't
get scattered and drive me nuts.